


Go to Part-II
- Catch-all routes.
- Navigate from the UI.
- Programatically navigate between pages.
- Custom 404 Page.
Next.JS is a powerful framework built on top of React. JS. It has some really cool features which surely enhance React to the next level.
Today we will discuss one feature Next that provides is file-based routing.
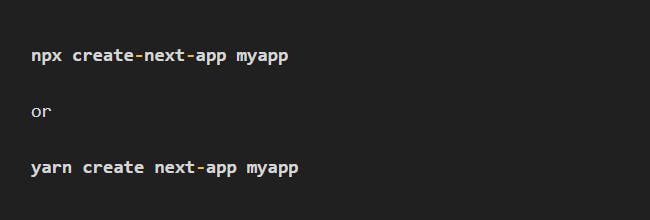
In order to make routing more simple, Next comes up with an inbuilt routing mechanism that runs on the file-based system. Now to get more in detail, let’s create the Next project by running the following command running on the command line, the only prerequisite you need is Node.JS installed in your system. And as a code editor, I will be using VS Code, you can choose whichever you are comfortable with.
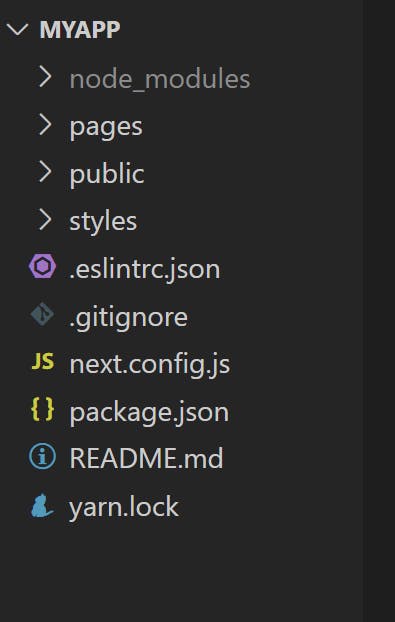
Now after the completion of the command, a fresh project will be created with such a folder structure,
Intro to File-based Routing.
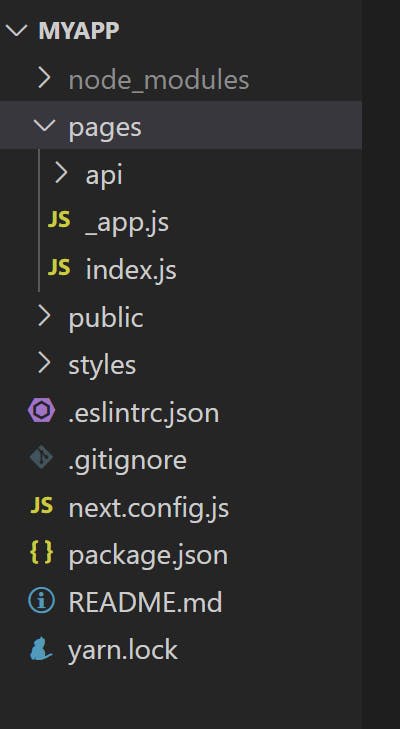
Here, the title itself suggests that routing is on the basis of files and folders, now the main folder responsible for routing is the pages folder which Next provides, opening the pages folder and Next has already provided us with the _app.js, index.js files, and an api folder. The _app.js folder is where all the components merge at the end.
Now, I am going to delete the index.js file and api folder, for sake of starting from scratch.
Now suppose, we want to create a route that leads to the home page or the most basic route of our project, and which is obvious the localhost:3000 in our case. So how do we achieve it in Next?
In the first step, right-click on the pages folder and create a new index.js file, and add the following boiler-plate code to it.
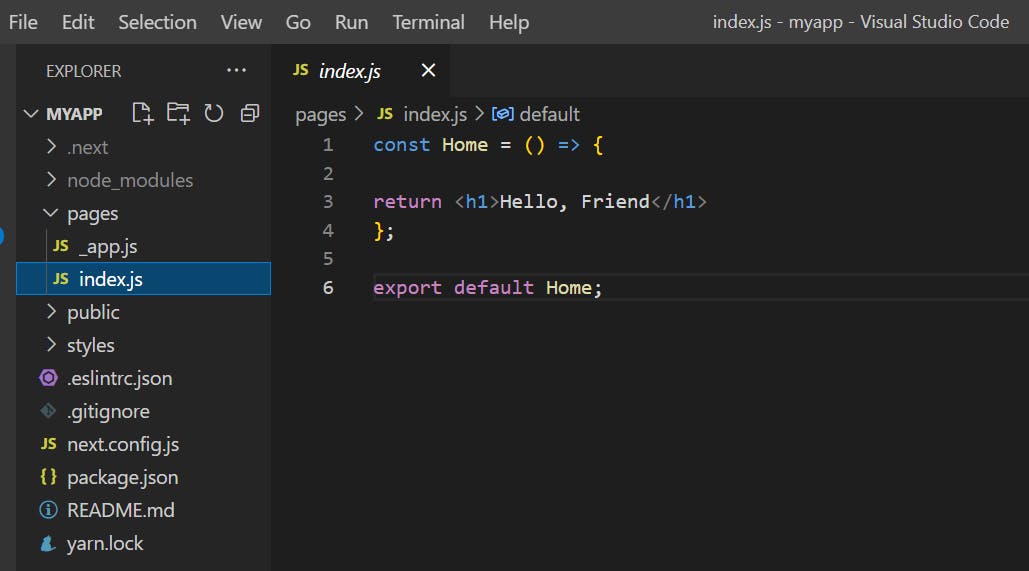
Creating a simple function that returns a message, and at the last export default the component.
This should give the following output when localhost:3000 is visited from the browser.
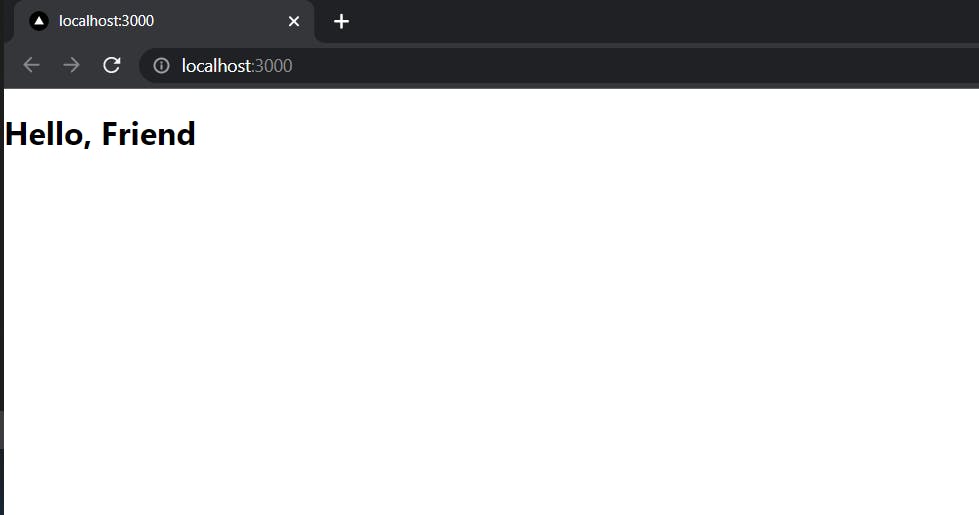
Ta-da, it is this simply just to create the very first route. Thanks to the Next.JS team for coming up with this feature, and making developer life easy.
Now, the point to take away is, that within the pages folder, a file named index.js will map to the root of all routing domains (localhost:3000), remember the file name has to be index.js which is a predefined rule by the Next team.
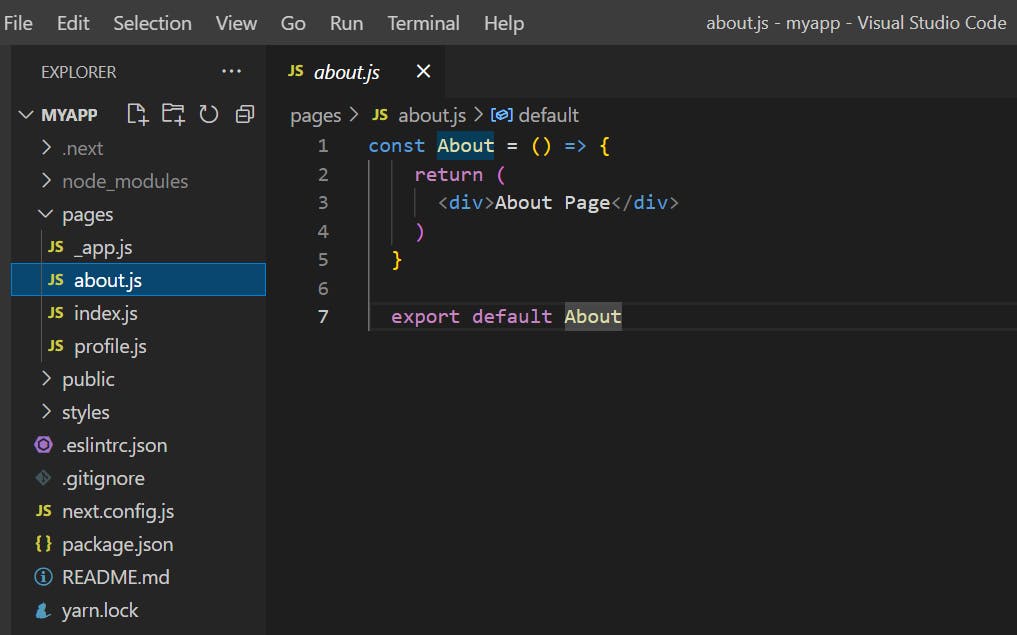
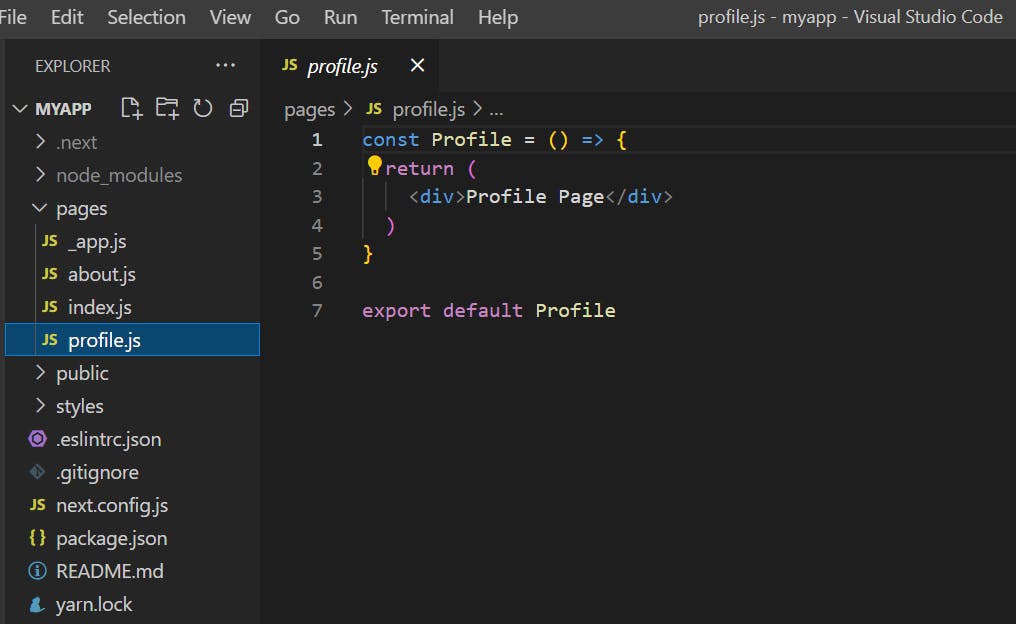
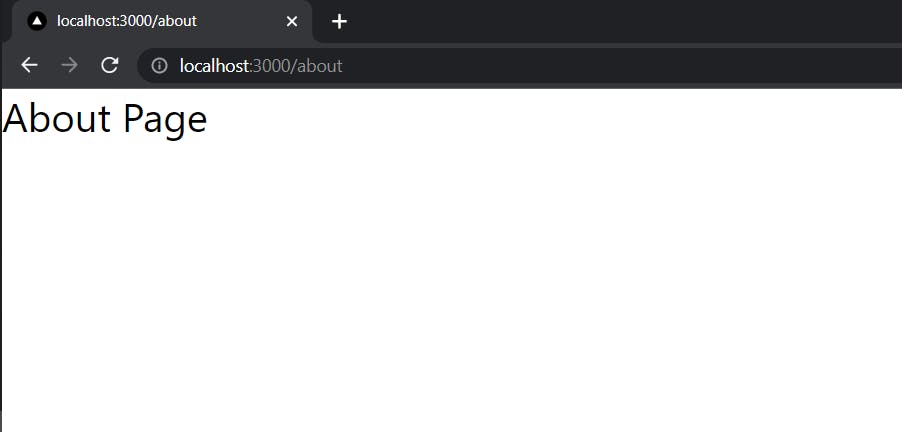
Let’s get another example, now suppose, we are building an app with multiple pages, like a profile, and an about page, so in this case, we can simply do is create two more files in the pages folder, named exactly as we want each route to be named, profile.js and about.js.
Run the following boilerplate code in each file respectively.
And you can see the following output, and there you have made an app with multiple routes.
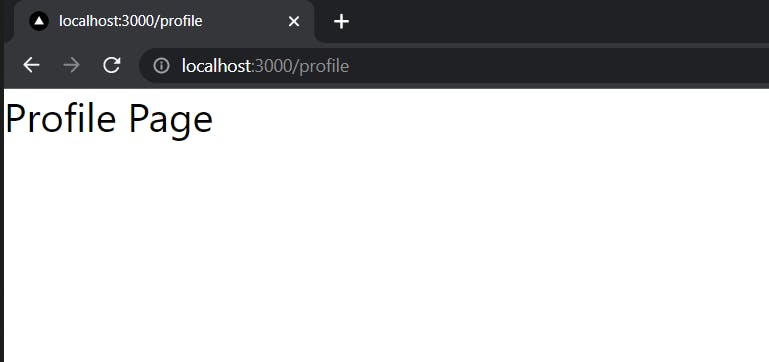
Here, what Next emphasizes more is the name of the file which will result in the name of the route, and the location of the file should be inside the pages folder, and Next.JS will take care of the rest.

Nested Routing
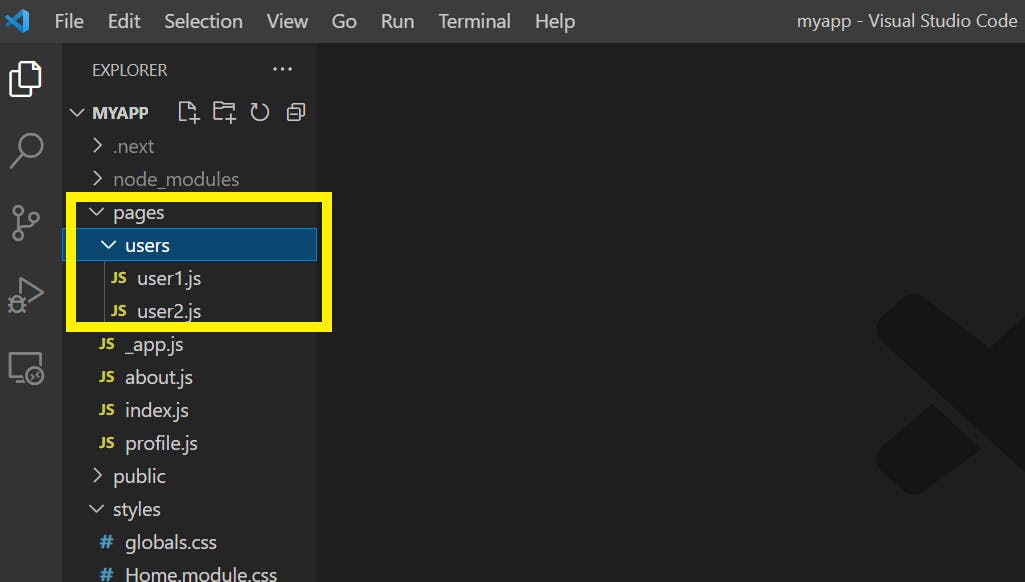
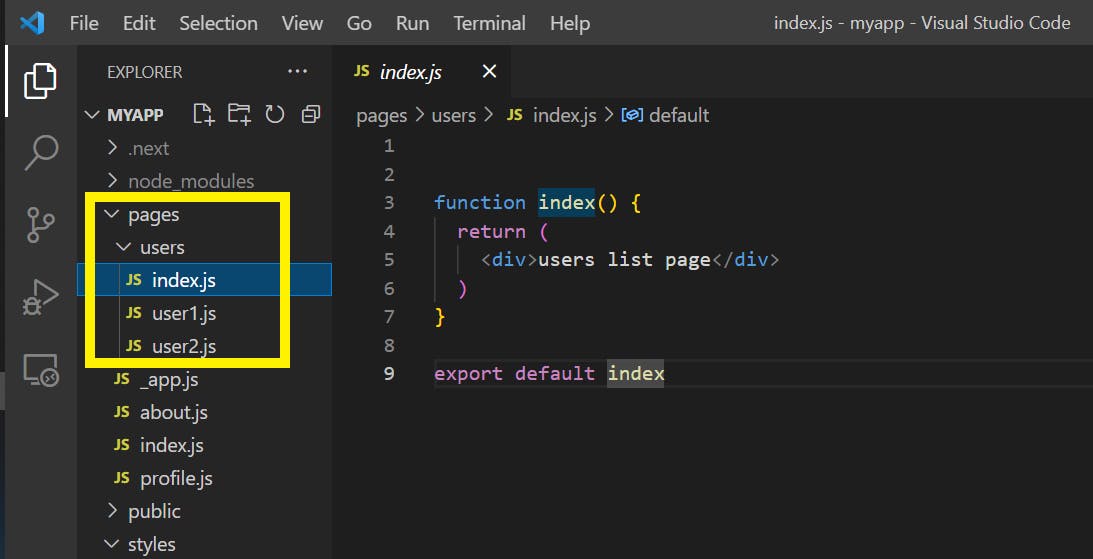
To understand how to create nested routes with Next.JS, let us assume we want to create multiple routes, first is a route that leads to the list of all the users in our app, which can be localhost:3000/users, this can be simply done with creating a user.js file in the pages folder as we all know. Now, what if you want to visit each individual user, suppose there are two users in our app so far, so to visit each of them the routes should be, localhost:3000/users/user1 and localhost:3000/users/user2.
Till now we have seen that only creating a file inside, pages folder leads to a route. But routes can also be created using folders too. And that is what we are going to need inorder ro create nested routes. According to our requirement we need /users as root route for the users pages, hence we will create a folder named users inside pages. And to visit individual user, there will be /users/user1 and /users/user2 routes. So to create those routes we will have to create two files user1.js and user2.js inside /pages/users. And by putting simple function returning just h1 tags inside each files will result into the following output. Our nested routes has been created.
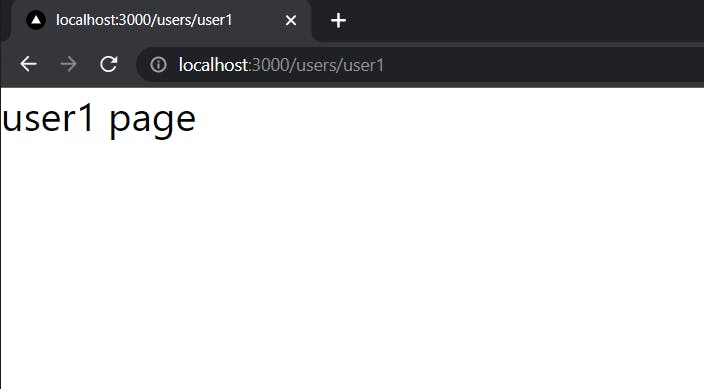
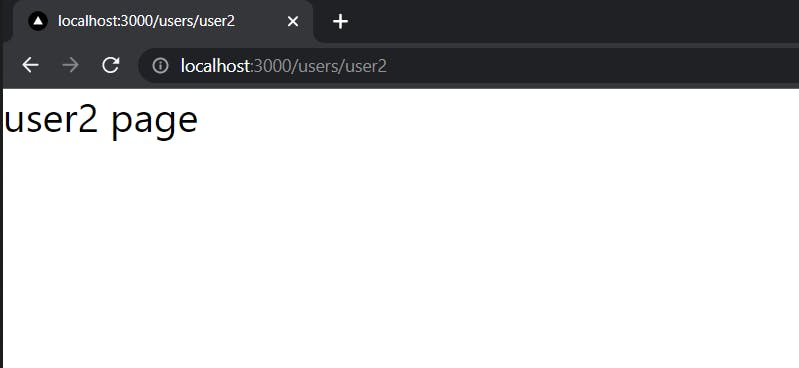
However till now, we can visit localhost:3000/users/user1 and localhost:3000/users/user2, but what about if I want to simply navigate to the /users, a user's route which can list down all the users. It’s simple just create an index.js file inside the users folder, and Next.JS by default will make the index.js file as root route with the name localhost:3000/users. And now as you visit /users, you would see the following output. So important point is a nested folder structure inside the pages will allow files to automatically route in the same way on the URL.
Dynamic Routing.
So we have seen how to create routes and nested routes that are static, now it’s time for dynamic routes, assume a scenario where you want to create a t-shirt store, and the URL address, for now, can be http:localhost:3000/t-shirts product which will list all the t-shirts that are available. Now, suppose a user wants to see more detail about an individual t-shirt, so the route for one t-shirt can be http:localhost:3000/t-shirts/1 and the file name will be product1.js as we all know, where product1 is the t-shirt that users want to visit. But there may be 100s of t-shirts in the store, so for all the t-shirts, we will need to create product1.js, product2.js, product3.js and so on which is definitely not a good idea.
Instead, we can create a dynamic route, by which we will need to create only 1 single file and that will hold as many product routes we want to keep.
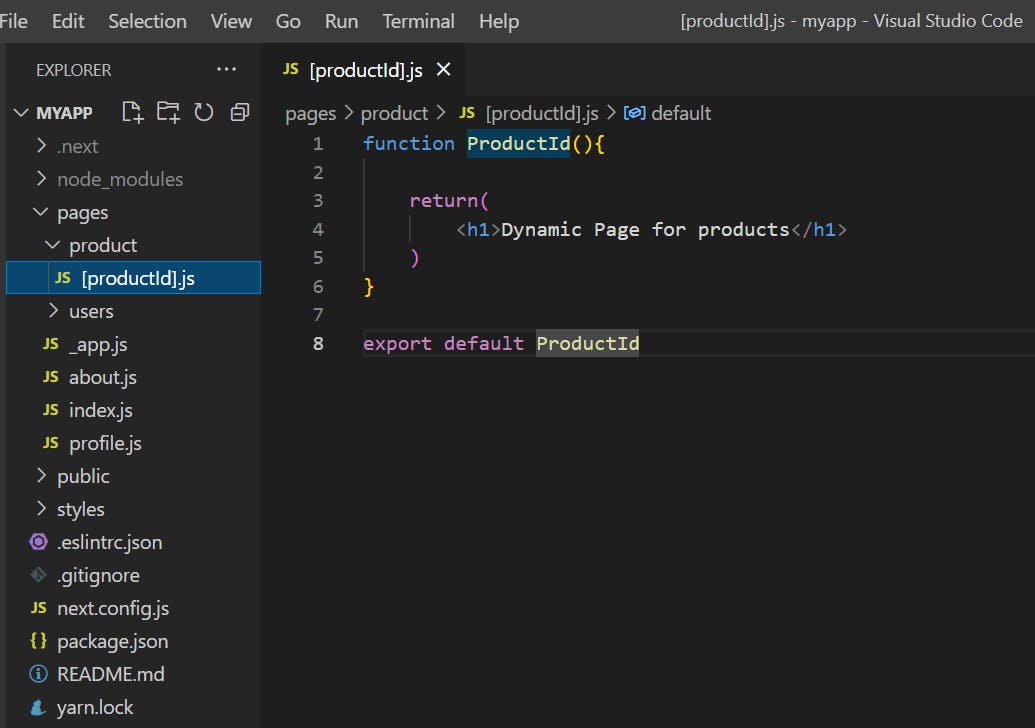
Let’s go back to the vs code to implement this scenario, lets us first make a http:localhost:3000/product route by simply creating a folder named product. And the main point to take away here is in order to create a dynamic route next, there is a predefined naming convention for the file and it’s like [filename].js, now let’s implement it.
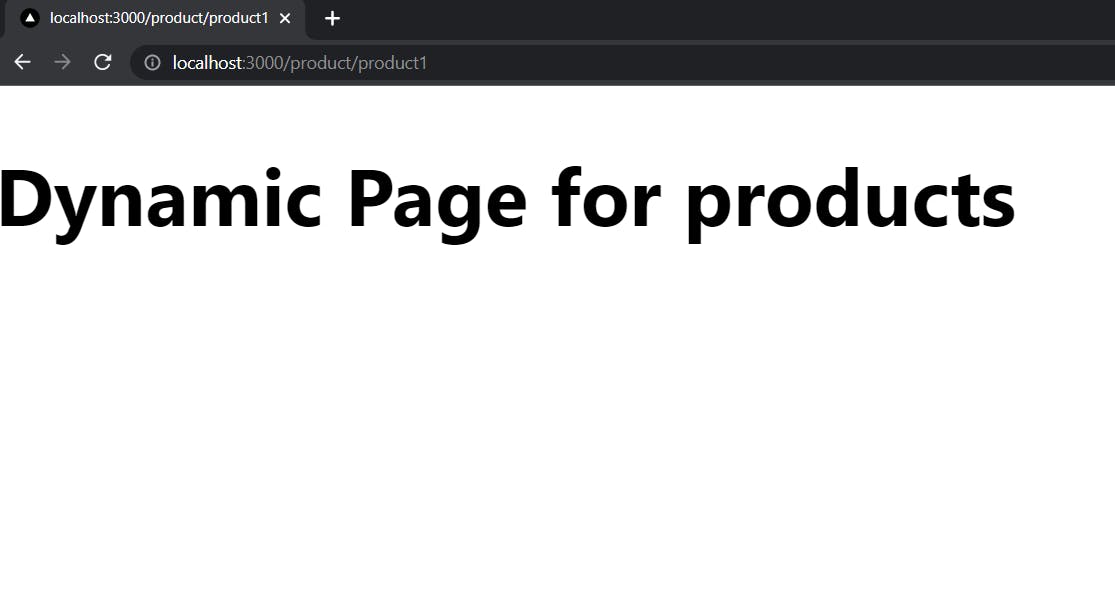
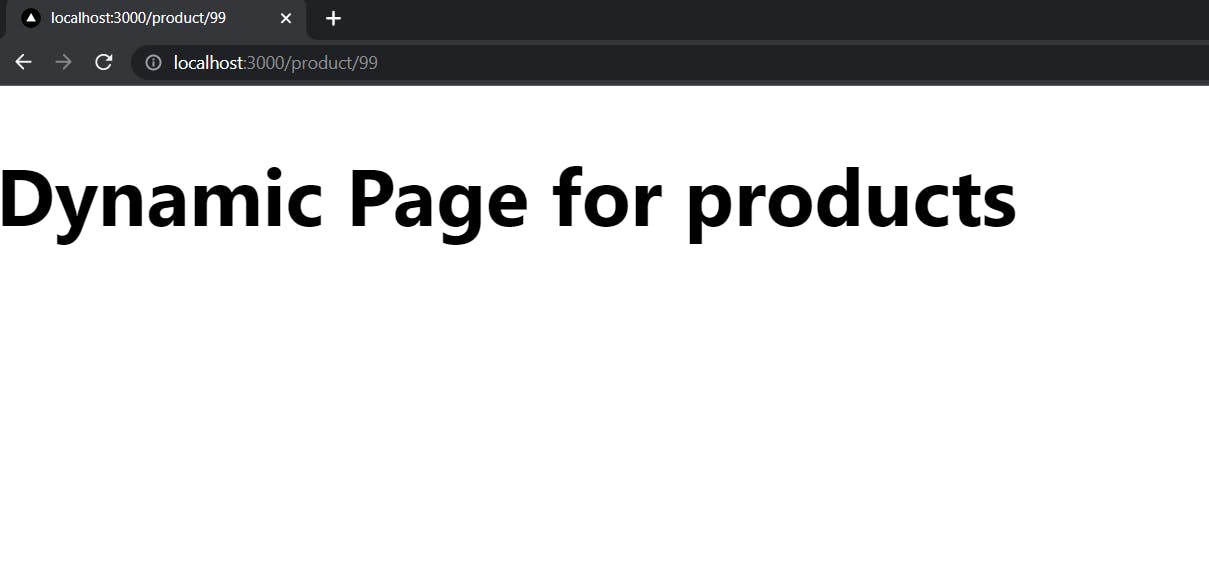
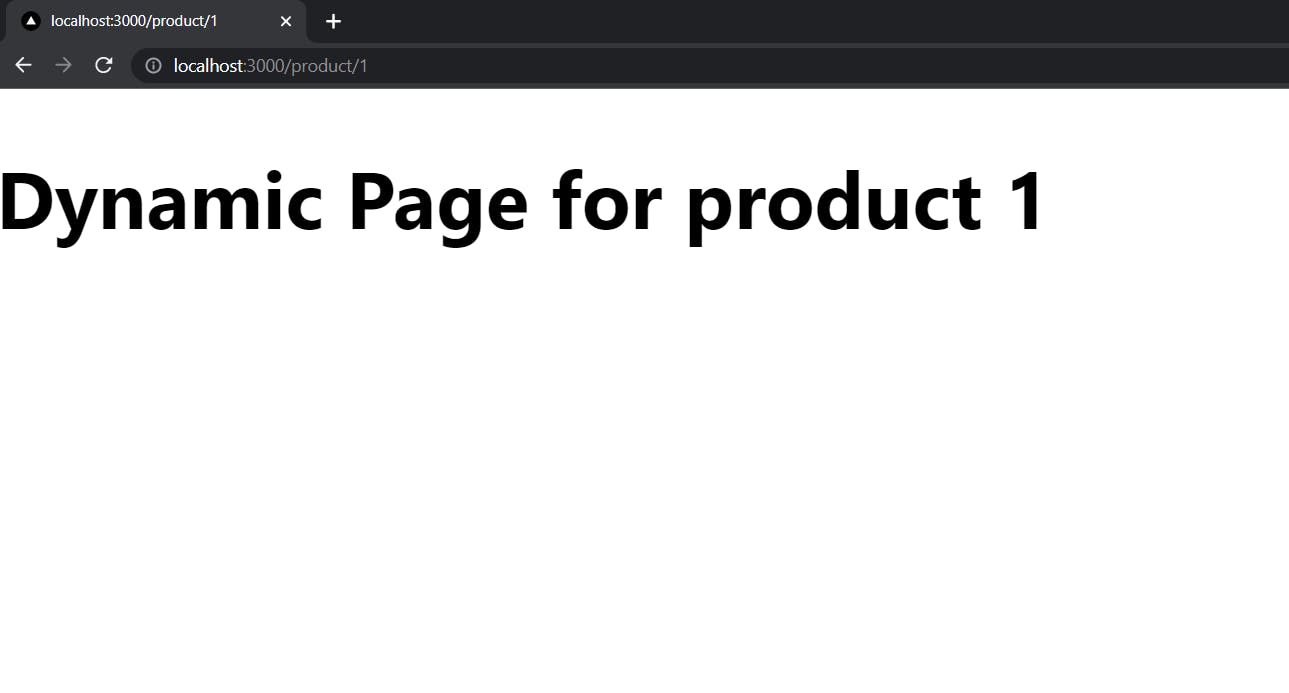
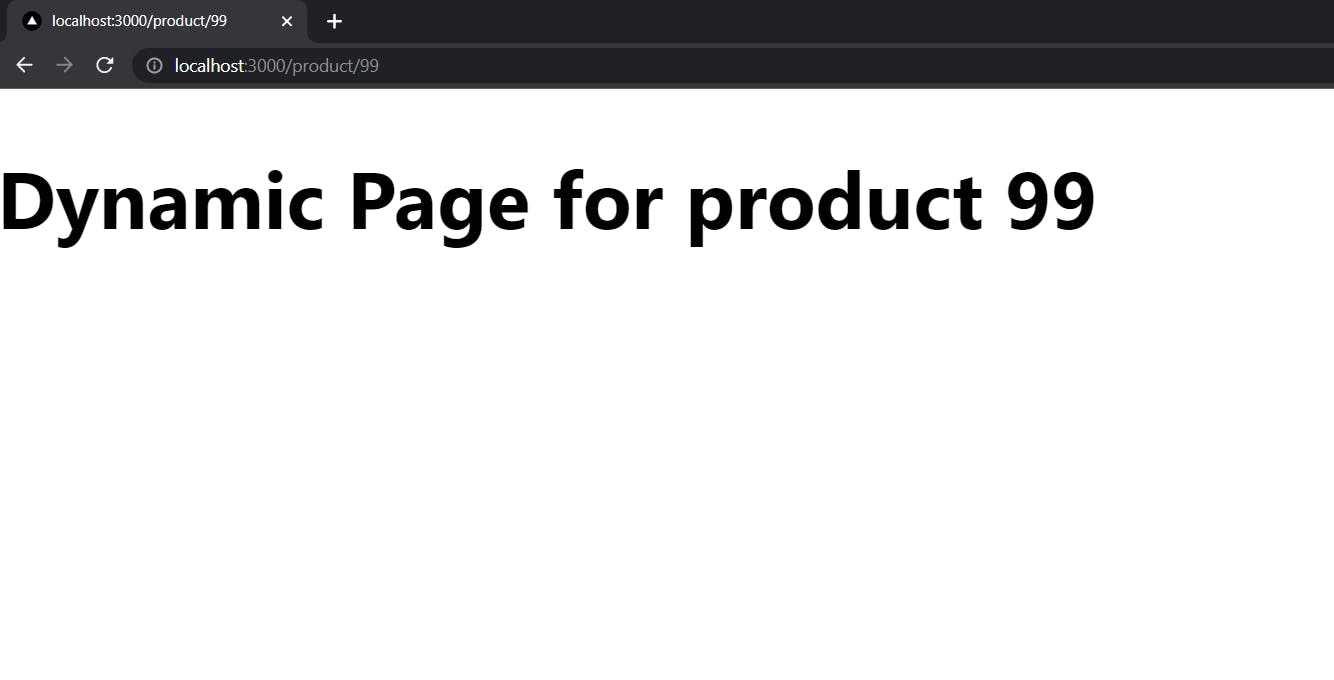
Now as you can see our dynamic route is working, after http:localhost:3000/product any value string or number is appended, Next will create a route for that particular value. As in the above image next, create a dynamic route for both product1 and 99 which are strings and numbers respectively.
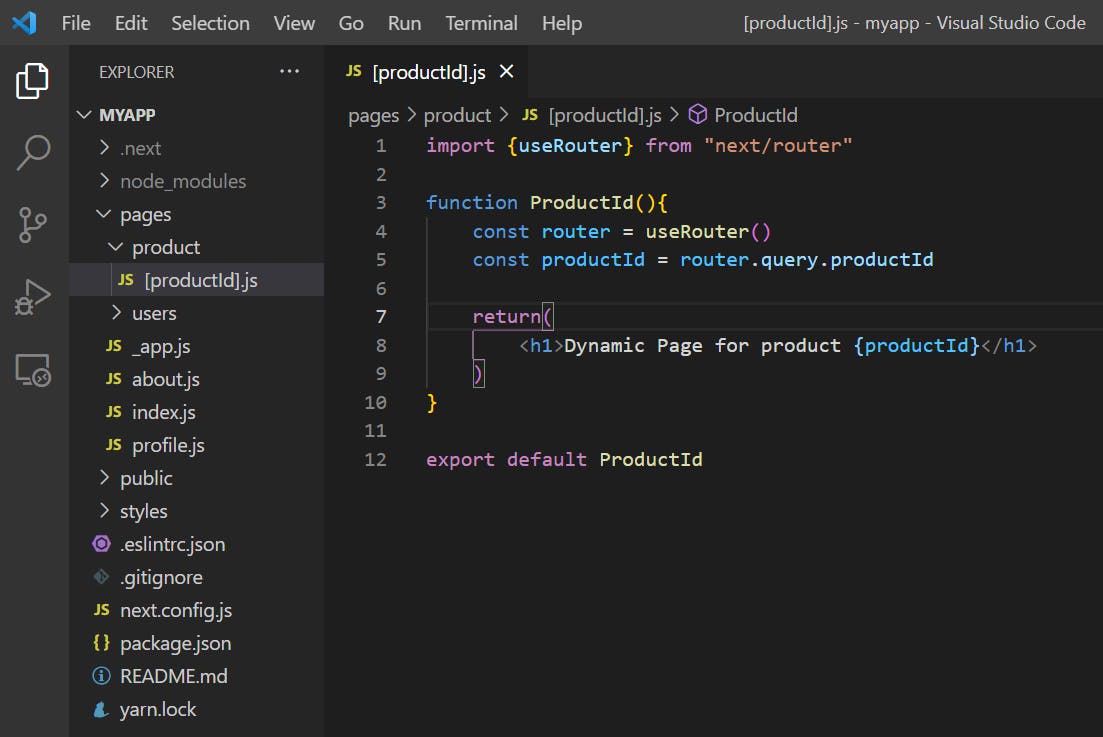
Now to show dynamic content on the page based on the value passed at the end of the URL, we will need to import a hook predefined in Next that is useRouter. This hook will help in extracting the URL parameter, first simply create a router object similar to line number 4 as shown below and that router will hold the router.query, the value that is passed to the URL will be held by the router.query.productId. And now passing the value to our JSX it will show the dynamic content on-page for every new value.
Nested Dynamic Routes.
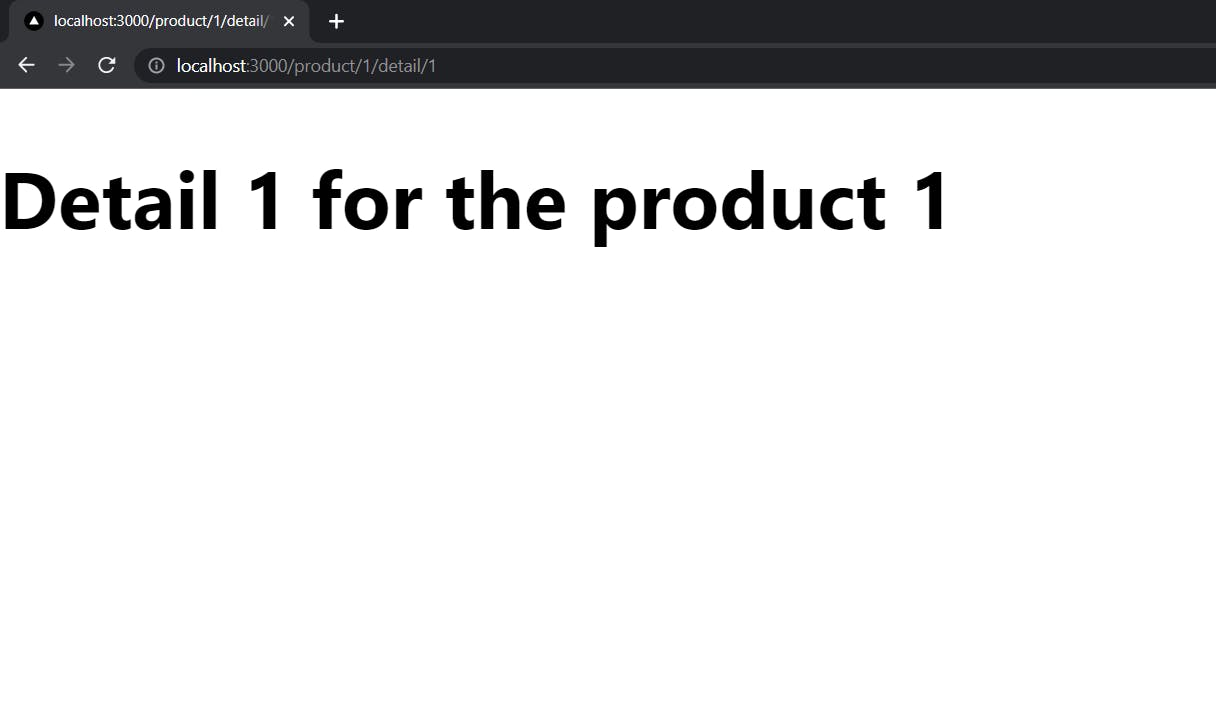
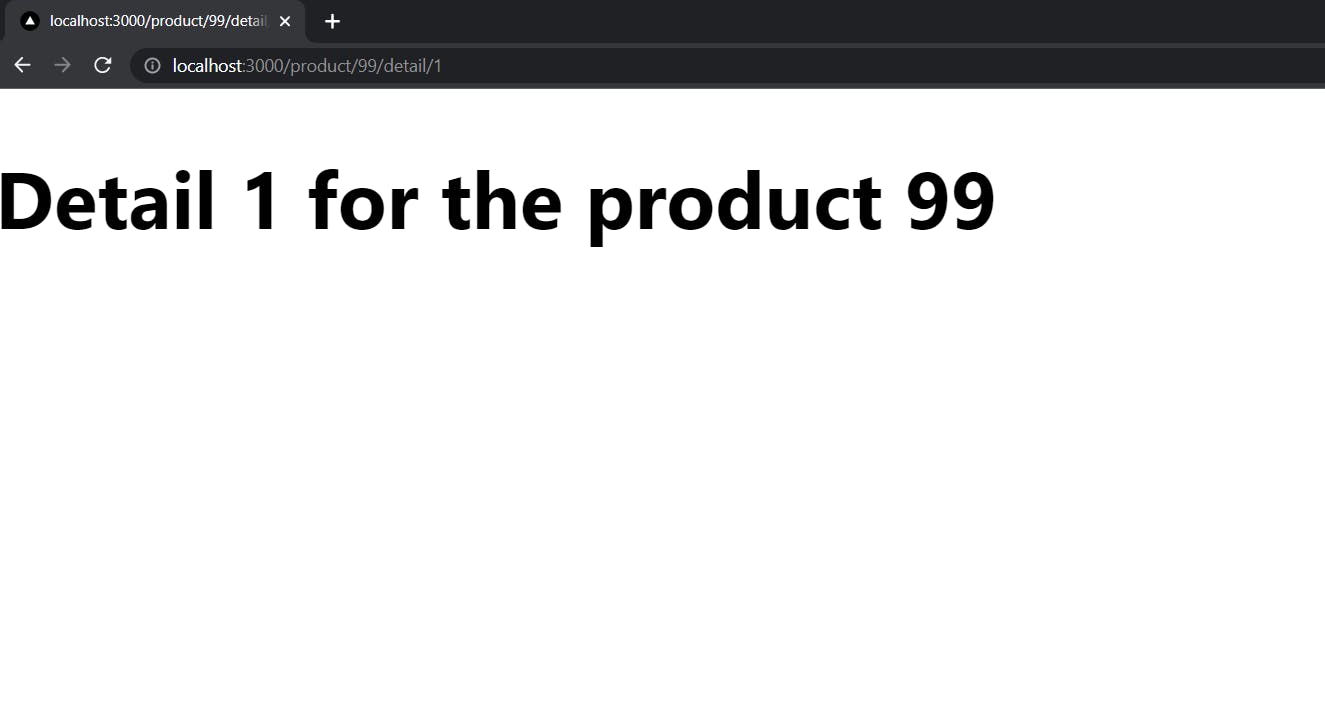
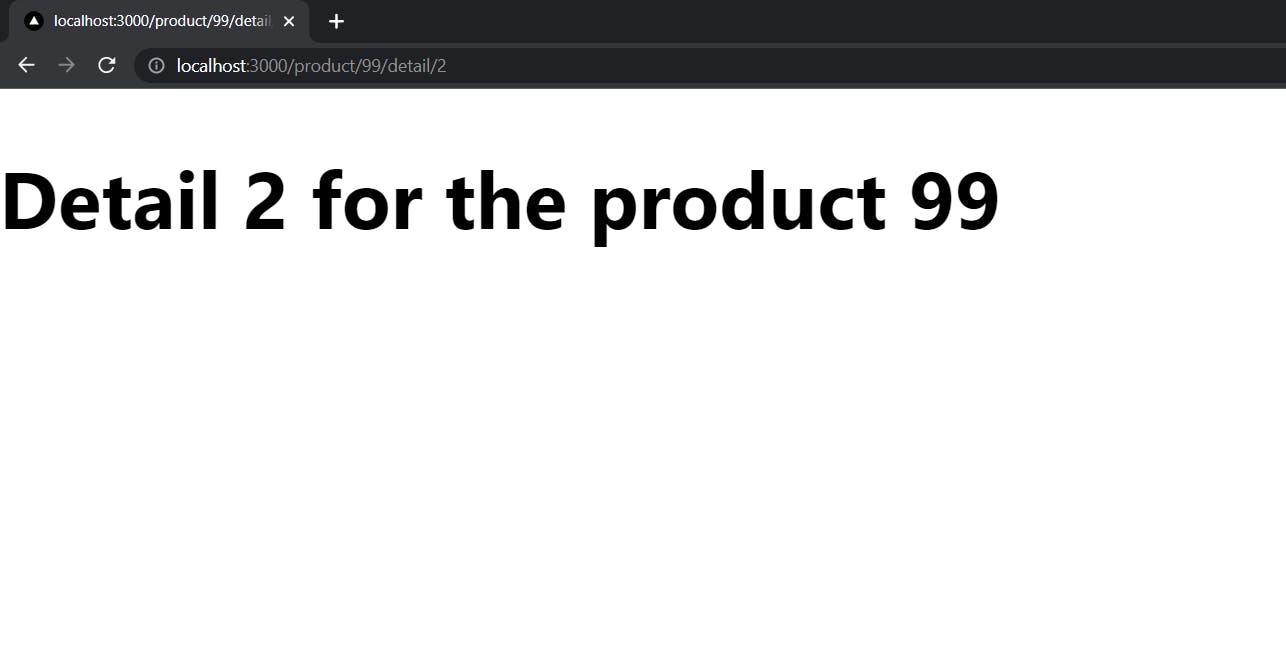
Now that we know how to create a dynamic route. Assume, that now for your app you have created already a dynamic route such as localhost:3000/product/1, where 1 is a dynamic segment. But you might also face a scenario where you would want to create something like localhost:3000/product/1/detail/1. Here instead of one, we got two dynamic segments in a nested way.
Now how to achieve this, let’s find it out.

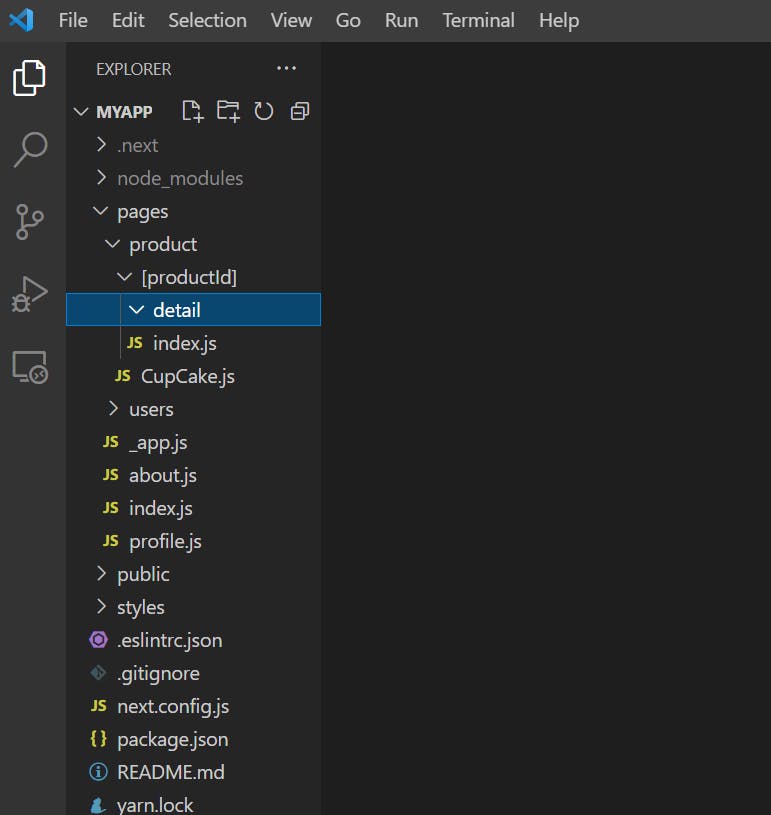
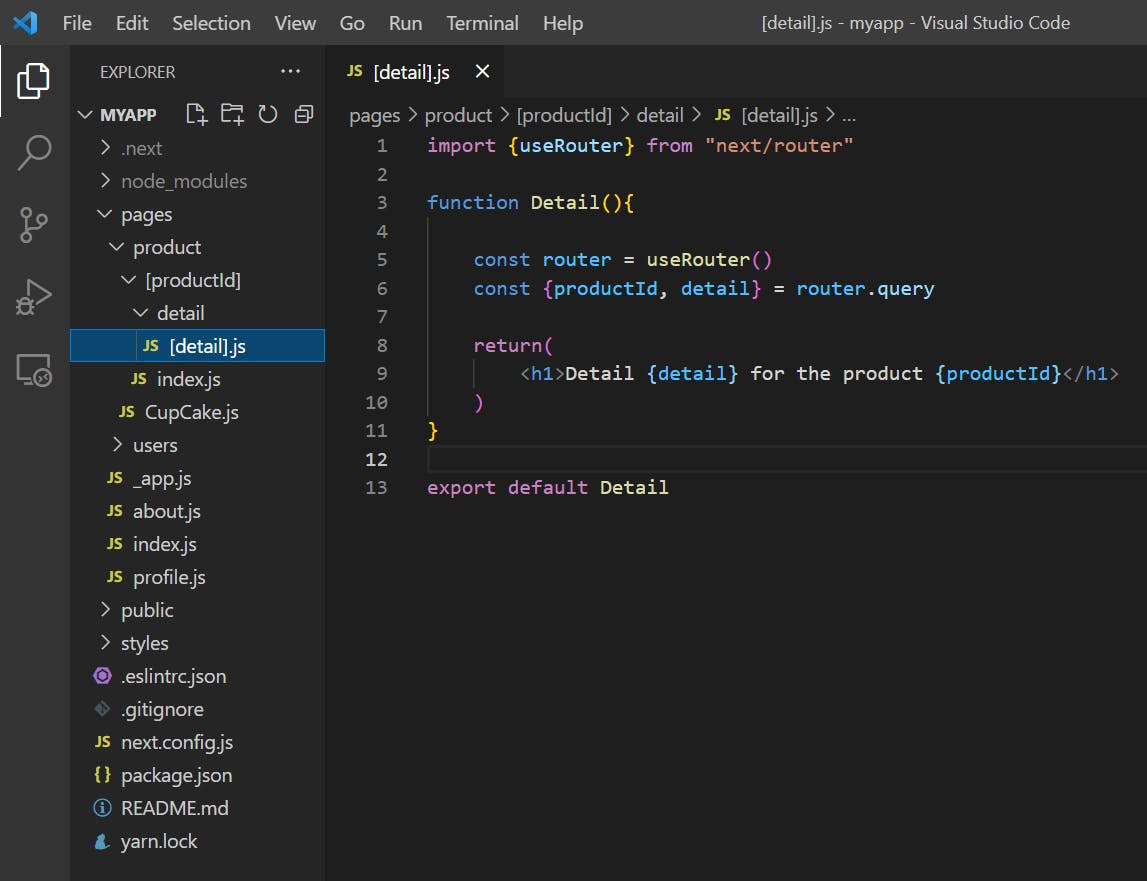
The first step would be create a [productId] folder inside /pages/product, just beside [productId].js file. Then create an index.js file inside the folder, and paste the same code of [productId].js file to the index.js file which is inside the [productId] folder. And when you will run the code, you can see that it works fine as before. This is the same as we did in the nested routes section previously. Now, you can delete the [productId].js file as we don't need it anymore.
Now the scenario that we need to achieve is localhost:3000/product/1/detail/1, let us break down the process.
First, we will go for localhost:3000/product/1/detail, to do that just create a detail folder inside [productId] folder.
Here, we have achieved our part one which is, localhost:3000/product/1/review.
Now on to the second part localhost:3000/product/1/review/1. You might have already guessed how can be achieved.
And the output you might see is,
 Hence, it is possible to create nested dynamic routes in Next.
The remaining topics are covered in Part-II, See you over there.
I hope this was helpful, You can follow me on Twitter and LinkedIn if you like, Ciao!